Saturday, April 20, 2013

PolishTBH : How I Troll

How I Troll is my first thermal polish! I really love the transition of transparent (warm) to hot pink (cold) I see in pictures of that polish. However, I live in Singapore and it's extremely warm here so I am a bit worried that the thermal might not work well in their weather. So, I have put this polish to the test! Let's look at the photos to see how the colors change in Singapore!


L-R: Two Fruity colors (unnamed) as bases and PolishTBH How I Troll.


At ~33 degrees,

The gradient is not present at this normal temperature in Singapore.


At ~0 degrees,

I was holding an ice pack when taking this picture. The gradient is obvious and I really love it like this! :)
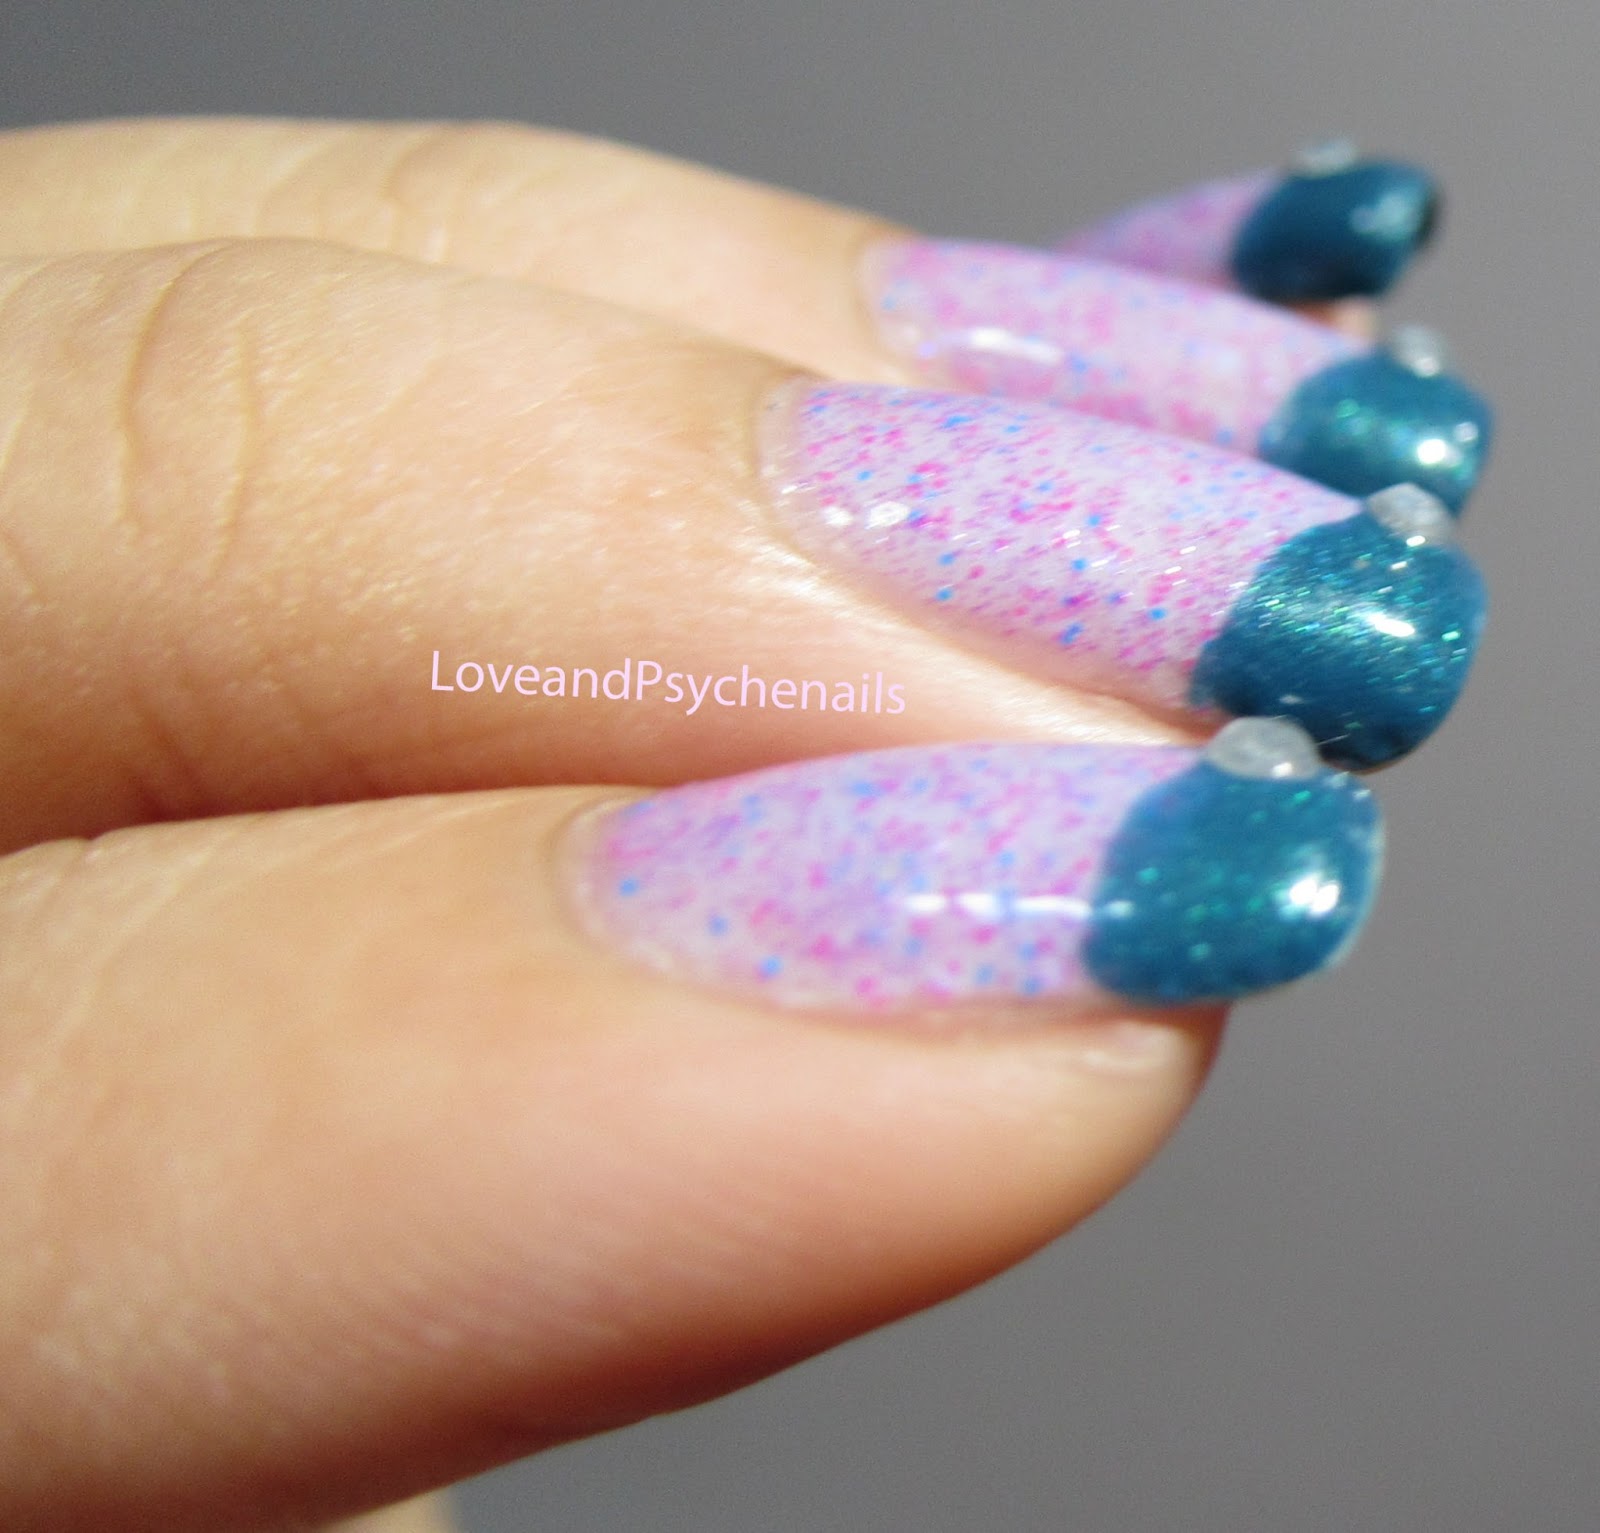

At ~20-23 degrees,

This picture was taking in a school's lecture hall. My hands were pretty cold from the strong air-con in the hall and so the whole nails transit to pink color.


Conclusion: I feel that thermal polishes might not work that well in Singapore, especially during this super hot period. I guess maybe it will work better in December when the temperature drops? Will try again to see if it works again next time. :) But still, the glitter mix in How I Troll is quite cute so I don't mind even if it doesn't show a gradient. :)


Thanks for reading! :)
XOXO


Sunday, April 7, 2013

Missha: Amethyst and Sasatinnie: black shimmery pink polish

Today I going to introduce 2 really affordable polishes I got recently. First is Missha Amethyst, which I got from 2plus1 on qoo10, and second is Sasatinnie black shimmery pink polish which I got from a Sasa store in Genting, Malaysia.

L-R: Sasatinnie black shimmery pink polish (with raspberry scent) and Missha Amethyst


Missha Amethyst is a glitter topper with pink, fuchsia, purple and blue hex glitters and pink star glitters. It is quite a watery polish BUT the brush is still able to capture a lot of the glitters! This really surprised me because I thought the watery formula will just make the glitters glide back into the bottle when I lift up the brush. But no! I was able to apply just 1 coat of this topper.

Sasatinnie black shimmery pink polish is a jelly polish. Like any other jelly polish, the first coat was unable to provide full coverage. However, opacity can be reached with just a second coat. This is a really good polish for the price that I am paying for (4.90 RM~ S$2). Application was really smooth and there were no bald spots at all. The pink shimmer was moderately visible on the nails, so it's definitely not as shimmery as seen in the bottle. Well, at least the pink shimmer was still visible on the nails! :)

Under indirect sunlight


Under artificial light. Look at the pink shimmer!

Under indirect sunlight. I have used Glitzology: Diamonds & Pearls on my accent nail.

Under direct sunlight. Look at how the glitters dance in the sun!


Here's a picture of Glitzology Diamonds & Pearls. It is a clear base polish with a variety of sliver glitters. Very pretty but cannot reach opacity even after 3 coats.


What do you all think about the combination of Glitzology Diamonds & Pearls and Missha Amethyst?? I really like it though! :)


Thanks for reading! :)
XOXO

Saturday, February 2, 2013

Jindie Nails: Princess Bubblegum and Contrary Polish: Aruba

When I saw Jindie Nails Princess Bubblegum and Contrary Polish Aruba in my stash, I immediately thought of Ariel the Little Mermaid. The lilac color of Princess Bubblegum reminds me of Ariel's lilac shells bra and Aruba is the perfect green for a fish tail! These two are an unlikely pair but I think the combination is great! :)

Princess bubblegum is surprisingly easy to apply and quite smooth. I thought that the fine glitters of pink, purple and blue colors will make it clumpy and sticky but no it wasn't! It spreads evenly as well, no streaks at all. :) In this mani I applied 2 coats of Princess Bubblegum to reach opacity. Here, I only used Aruba for some curved chevron and appiled 2-3 coats to reach opacity. Aruba is a nice teal with a shimmer. It was quite smooth to apply at first but it starts getting a bit sticky after a few dipping. I guess I have to roll the polish bottle once in awhile!

L-R: Contrary Polish Aruba and Jindie Nails Princess Bubblegum

My mani with my Ariel pen! :)


Under flashlight

Under artificial light. Look at the fine glitters!

Trying to show the shimmer in Aruba. Can you see it?

Took a blurred picture and the shimmer in Aruba appeared more obvious.

Under indirect sunlight

Under direct sunlight


Thanks for reading! :)
XOXO

Saturday, January 12, 2013

Pretty & Polished: Cheer Camp

It was love at first sight with the polish.<3 Milky base always catches my attention and the glitter mix of baby pink and lavender hex glitters and micro pink glitters makes this an awesome polish! Application was super smooth and the glitters don't clump at all. Also, I dislike small brushes as they don't spread the polish very well and this polish came with a small brush. Luckily, the formula for this polish is so smooth that even a small brush pose no problem! I am very impressed and satisfied with the polish. :)

Index and middle finger: 3 coats of Cheer Camp
Ring finger: 2 coats of OPI I Pink I Love You and 2 coats of Cheer Camp
Pinky: 2 coats of OPI I Pink I Love You and 1 coat of Cheer Camp


3 coats of CC VS 2 coats of OPI IPILY and 2 coats of CC VS 2 coats of OPI IPILY and 1 coat of CC
CC alone has a white base so I added OPI IPILY to give it a pink undertone.


Then, I added a bit of nail art to this mani.


The tools I have used:

Pin, fine paint brush and small dotting tool


1. Use a dotting tool to dot out the cloud.
2. Use a pin to dot 2 vertical lines (I used a pin instead of a dotting tool as it can create smaller dots).
3. Using the pin again, draw a small 'v' (which represent the heart) under one of the dotted lines.
4. Draw another small 'v' under another dotted line.
5. Use a fine brush to trace the hearts with white polish. Lastly, seal your mani with a topcoat.


Thanks for reading! :)
XOXO


Wednesday, January 2, 2013

Ardent Lady: Matte reddish-brown polish

This is a Korean brand polish which I bought a year ago and totally forget about it until now. :P So glad that I found it again because this color is just so pretty!! :D It dries matte so I didn't put any topcoat on. At first I applied 1 coat of it cos it seems opaque already. Then, when I tried to take photo of the mani, I spotted many bald spots. So I ended up applying 2 coats. It dries amazingly fast so I have to cover the nail with 3 swipes in order to reduce streaks. The trick is to apply thick coats so that it will spread more evenly. One thing about this polish is that it chips really easily. Even after I applied a matte topcoat (which changed the color of the polish for the worst), this mani still chips on the 3rd day. :(

Ardent Lady reddish-brown polish: 2 coats without topcoat

Without topcoat

Stamping with Sally Hansen Gilty Pleasure, with Seche Vite topcoat.

I think this polish looks good with topcoat too! Topcoat makes the glitters shine more. :)


Thanks for reading! :)
XOXO

Friday, December 28, 2012

Pretty & Polished: Libra Scales

Libra Scales is a blue glitter bomb! It has blue square glitters, small hex glitters and shard glitters in a blue jelly base. It was quite easy to apply but the glitters need to be built up. There weren't a lot of glitters in 1 coat.

Libra Scales: 2 coats alone with Seche Vite topcoat


Of course, to make it more representative of "scales", I have to stamp scales over them!

Nail polishes used for scales, from thumb to pinky: Essence Sparkling Champagner, Michelle M49, Essence Chic Reloaded, Essence Mystic Mermaid, Essence Glisten Up!

Thumb: Essence Sparkling Champagner

From the picture, I think Essence Mystic Mermaid shows up the best as scales, while Essence Glisten Up! can't be seen at all.


Thanks for reading! 
XOXO

Friday, December 14, 2012

Jindie nails: Candy Land

I have got Candy Land from Jindie Nails!! Wheee~!! HAHA. I wanted to try it the moment I received. It just look so pretty! Here are the pictures of Candy Land!


Under artificial light

Under artificial light

Under indirect sunlight

For the swatch, I have applied 2 coats of 2 base colors before applying 2 coats of Candy Land. In my opinion, I feel that it is a MUST to apply a base color as applying Candy Land alone will not give full coverage and it may be a bit streaky. 


I have used Tony Moly Sugar Apricot (off-white crelly) as base color for all fingers except the ring finger and used The Face Shop white polish for the ring finger.

White base color vs off-white base color

With the white polish as base color, I was able to use the dabbing method to apply Candy Land. With the off-white polish, I have to use the usual nail painting method as the base color wasn't opaque. If you have an off-white polish that is opaque, you can use the dabbing method to apply Candy Land. The dabbing method is better as it allows you to position the hexes nicer.

So what do you think of Candy Land? Better with white base or off-white base? :)


Thanks for reading! XOXO